
Lifestyle photography showcases your products in real-life situations, out in the real world. This allows potential customers to envision themselves using your products in their everyday lives. 75% of online shoppers rely on product photos when deciding on a potential purchase¹. High-quality lifestyle photography not only helps you drive conversions in your Artist Shop, but it can also increase engagement on your social-media posts. More shares equals more conversions!
Most lifestyle photography requires a professional-grade camera, near-perfect natural lighting, and volunteers willing to model your products. Hundreds of hours of photography training helps too. But let’s be real, who has access to any of that stuff? To give you a leg up, we’ve assembled a collection of customizable lifestyle overlays you can edit your designs into using software such as Adobe Photoshop or GIMP.
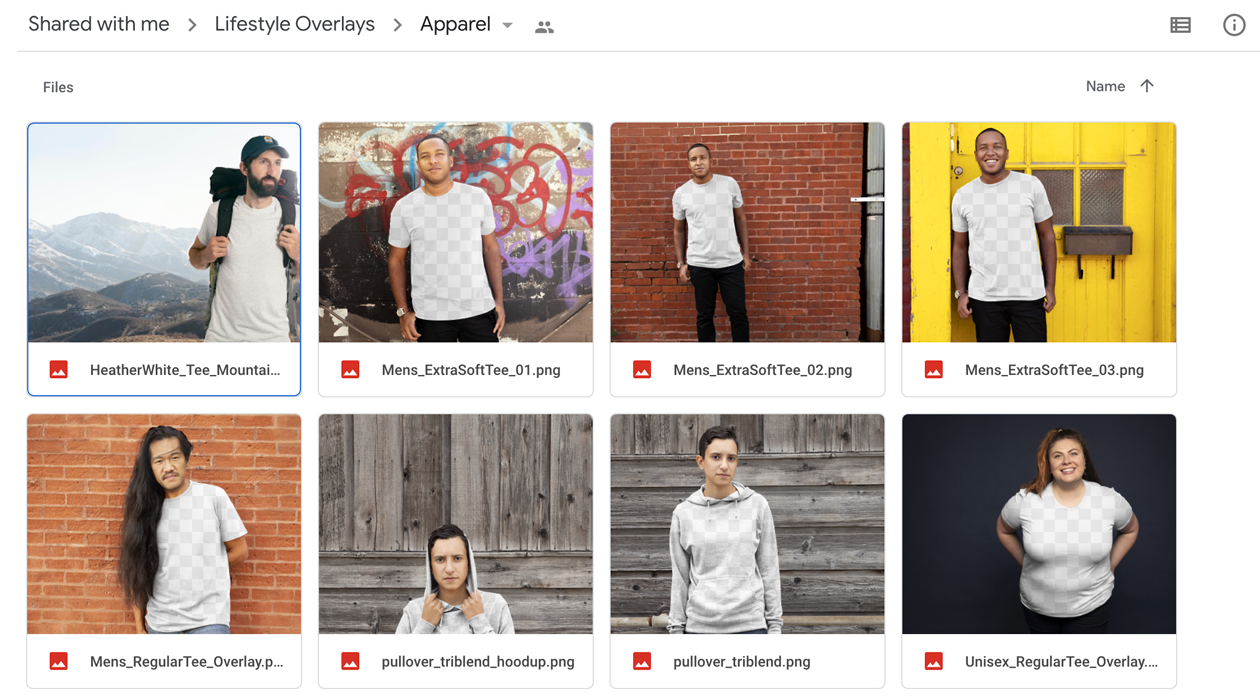
These professional lifestyle overlays feature all sorts of apparel, accessories, and home goods you can make available in your shop today. Use them to create promotional images that will grab attention in your Artist Shop’s Homepage Collection and on social media.
How to Add Your Designs to Lifestyle Overlays
1. Go to our lifestyle overlay collection and download a transparent overlay image that fits the aesthetic of your shop.
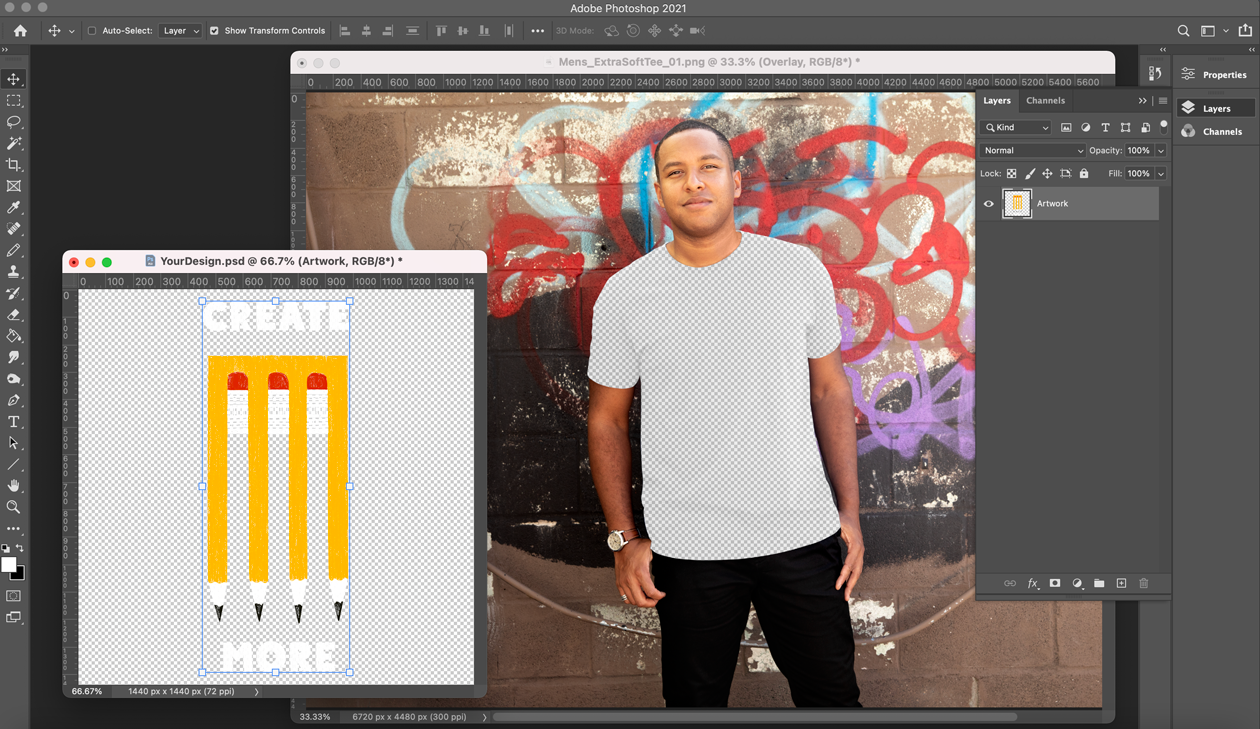
2. Open the lifestyle overlay image in Photoshop (or an open-source equivalent like GIMP), as well as the design image you want to add. Make sure your design has a transparent background so it’ll blend seamlessly into the garment color. Copy and paste the design into the lifestyle overlay as its own layer.
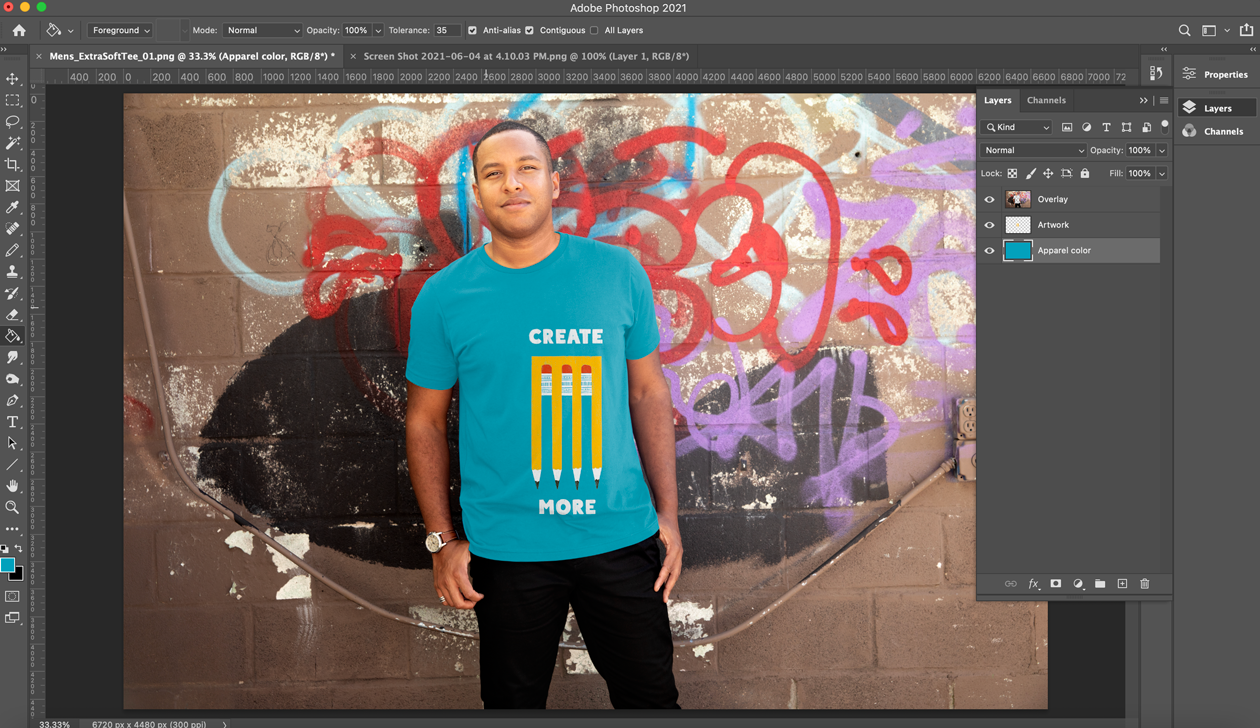
3. Next, find a garment color that’ll look good with your artwork. Go to your Artist Shop and look at the colors you’ve made available for the design and product you’re featuring. When selecting a garment color, consider the overlay’s background colors, the lighting, and other factors to make your final image look as cohesive as possible.

4. Pull the color value from your selection and use it to fill a background layer behind your design. Notice the “Apparel color” layer in the screenshot below.
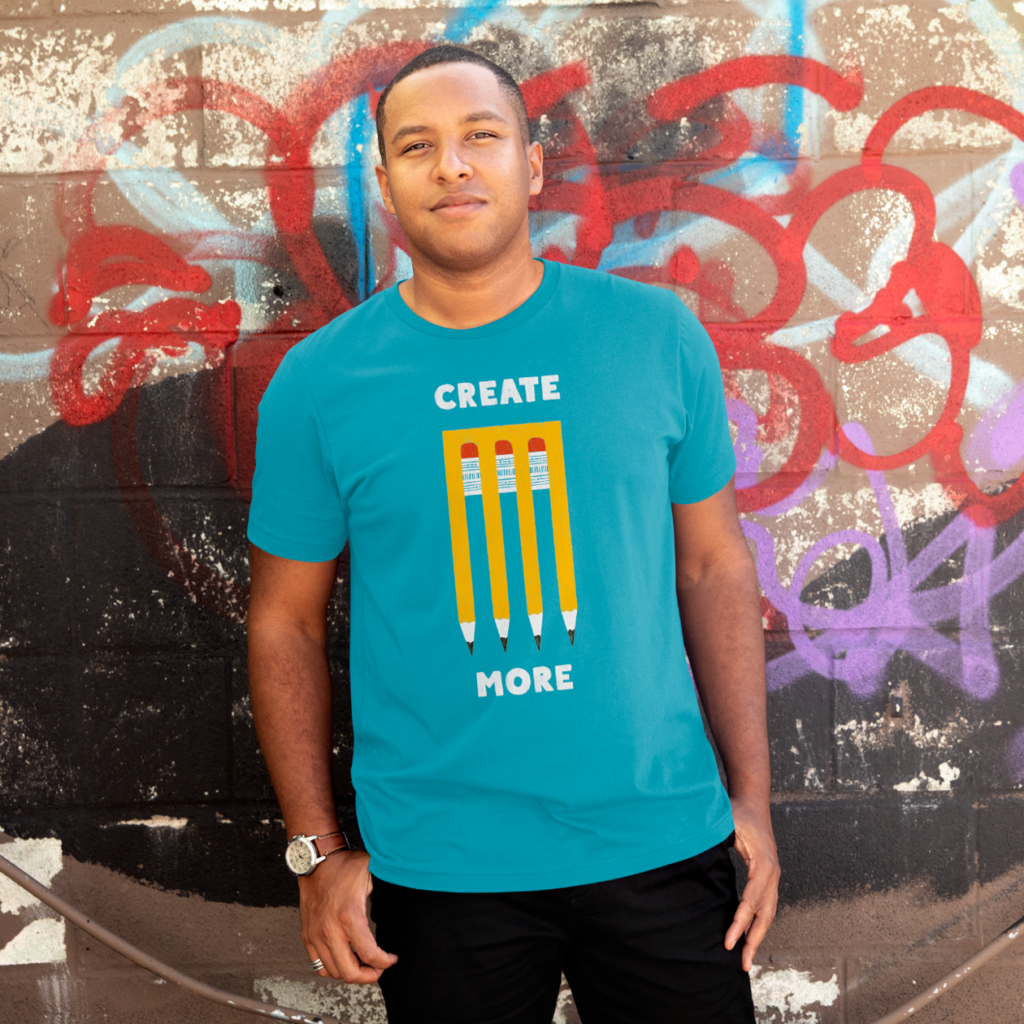
5. Now it’s time to adjust your design placement to ensure it looks realistic and accurate. Move, scale, and rotate as needed until it feels correct. Then, crop the overall image, keeping in mind whether or not you’d like the model to be centered or off-center. Once you’ve adjusted everything to your liking, save the image as a JPG. You’re done!
How to Add Your Lifestyle Images to Your Homepage
Having a mix of custom imagery on your shop’s homepage is a good way to attract the attention of visitors and potential customers. Follow the steps below to add your new lifestyle images to your Homepage Collection.
1. Go to Collections in your Artist Dashboard and click on your Homepage Collection.

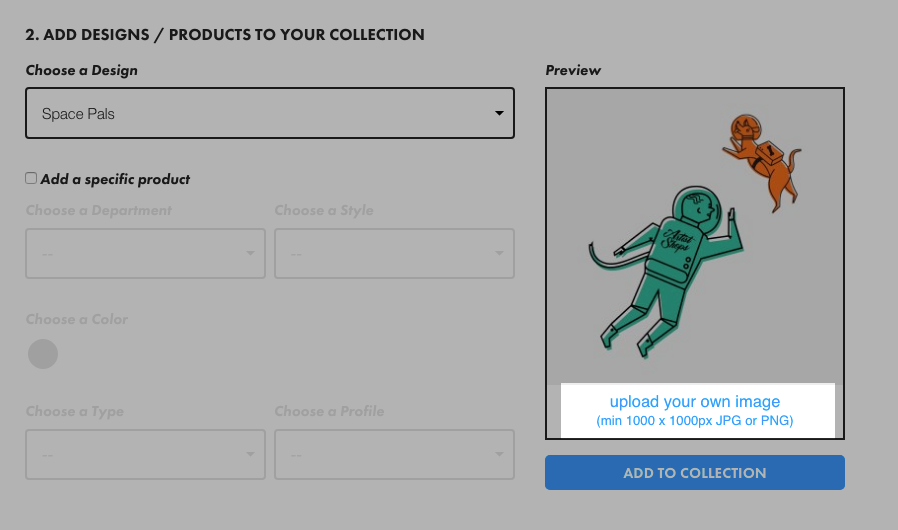
2. Scroll to ADD DESIGNS/PRODUCTS TO YOUR COLLECTION, then select a design to add. Once selected, click on “upload your own image” to add your custom photos. Then, click “Add to Collection.” Repeat this process for all of the designs you want to include in your Homepage Collection.
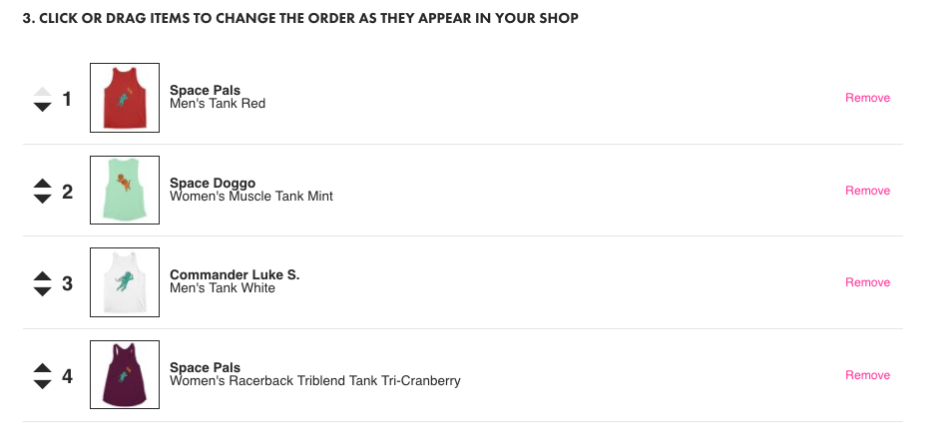
3. Arrange your designs in the order you’d like them to appear in your Homepage Collection. Simply drag and drop your designs to reorder them.
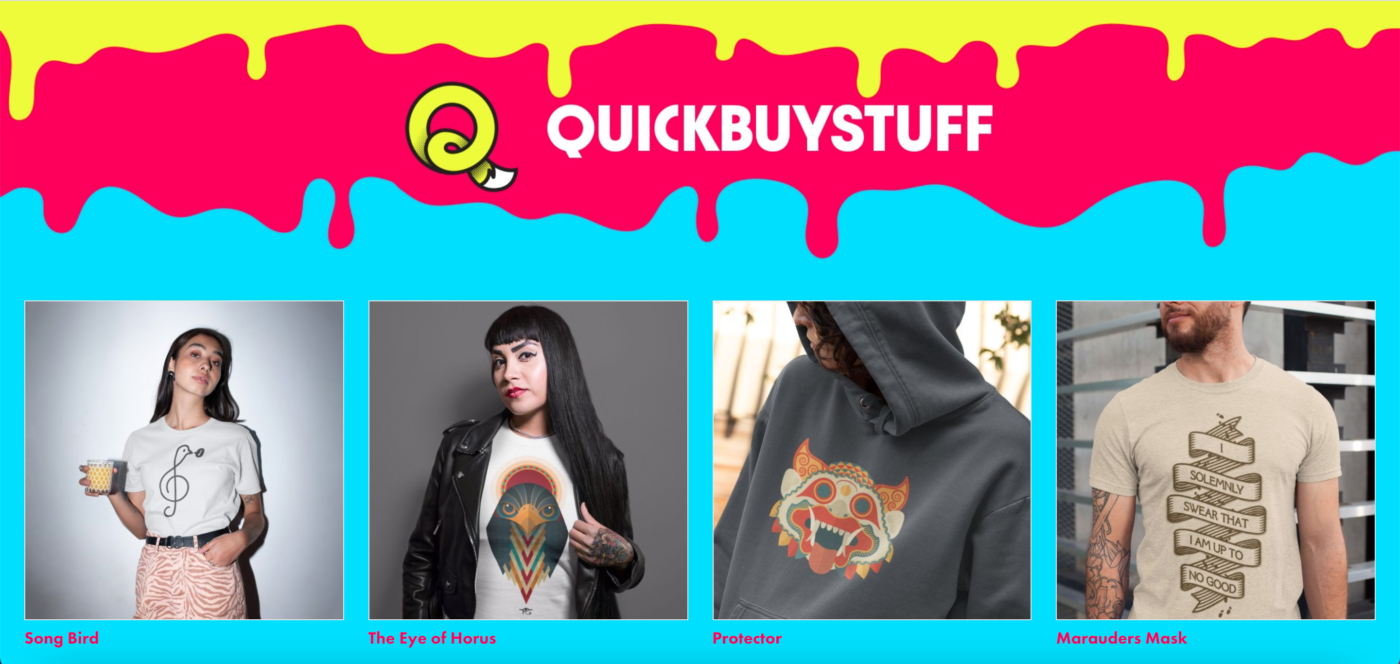
4. Publish your collection. Here’s an example of a real-life Homepage Collection with great lifestyle photography:
For more tips on sprucing up your homepage, read our Creative Resources post on the anatomy of a perfect homepage.
Share Your New Lifestyle Images on Social Media
Your lifestyle images not only make your shop look more professional, but they also help you build a community around your brand. Good visual content is 40% more likely to get shared on your social accounts². Use your new lifestyle images to start conversations with your followers and increase engagement. When you post on social platforms such as Instagram, Facebook, and Twitter, be sure to do the following:
- Write a thoughtful caption. Tell the story behind your designs, promote your sales, or even ask your followers questions like, “What do you think about my new design?”
- Use relevant hashtags. This will make your post more visible to non-followers who could potentially be interested in the art you make. Who knows? Maybe they’ll buy something.
- Link or direct followers to your Artist Shop. Don’t forget this step! Always make it easy for people to find your shop’s homepage.
- Tag @Threadless. If we see your post, there’s a chance we may repost it for our entire community to see.
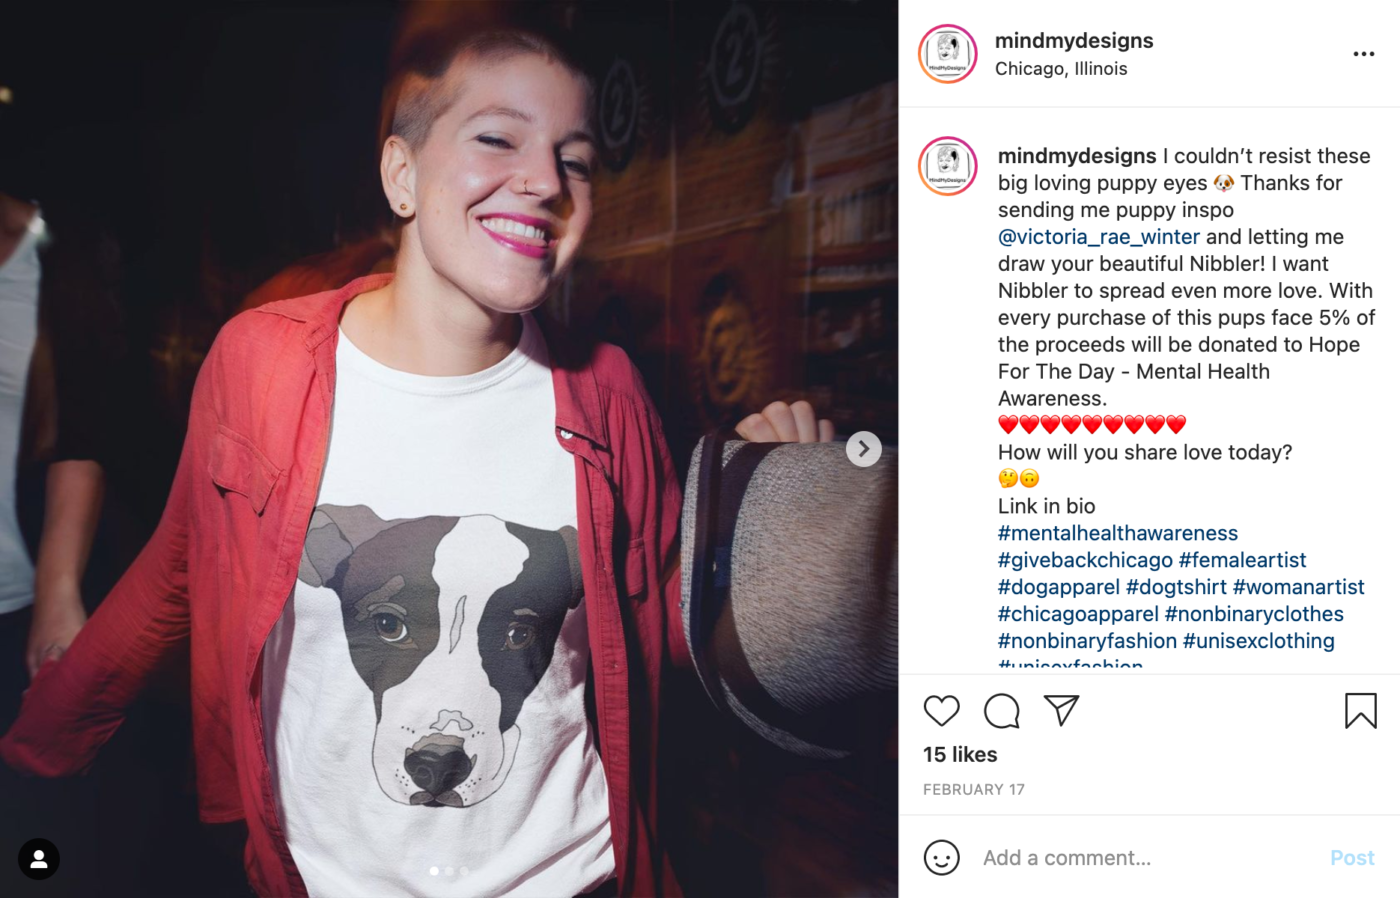
For an example of a good social-media post, take a look at this Instagram post by MindMyDesigns. The caption includes background on the design and plentiful hashtags. It also tells viewers where they can find the featured shirt (“Link in bio”).
Our customizable lifestyle overlays are only one way to bulk up your promotional materials with lifestyle imagery. You can also use an online service such as Placeit, which offers hundreds of ready-to-use image templates. Visit this link for 20% off a monthly subscription.
Want to try snapping lifestyle photos of your products yourself? Go for it! Read our Creative Resources post on how to take awesome lifestyle photos with your phone.
Footnotes
- Statistic from efelle creative.
- Statistic from efelle creative.
Related Posts