Fact: The best thing you can do to grow your shop sales is to start an email newsletter.
Here’s how start a newsletter for your shop in just a few steps:
Sign up
First, sign up for an account with your favorite email service provider. For the purposes of this article, let’s go with Mailchimp. We use Mailchimp at Threadless and if you sign up for an account using this link, you will get a $30 credit on your account. Mailchimp is also free for your first 2,000 subscribers!!!
When you sign up, Mailchimp will walk you through a number of steps to get your account all set up. You’ll choose a username and password, and then activate your account via an email they will send you. Next you’ll need to give some basic info like your name, your business/project name, your website (use your shop address), and mailing address (for anti-spam law compliance). Then they’ll help you through building your list, connecting your social media accounts, and walking you through some of their own marketing tips. It’s a great onboarding experience and there is a lot to learn in there.
Once you get through the initial account setup, you will get to a screen like this:
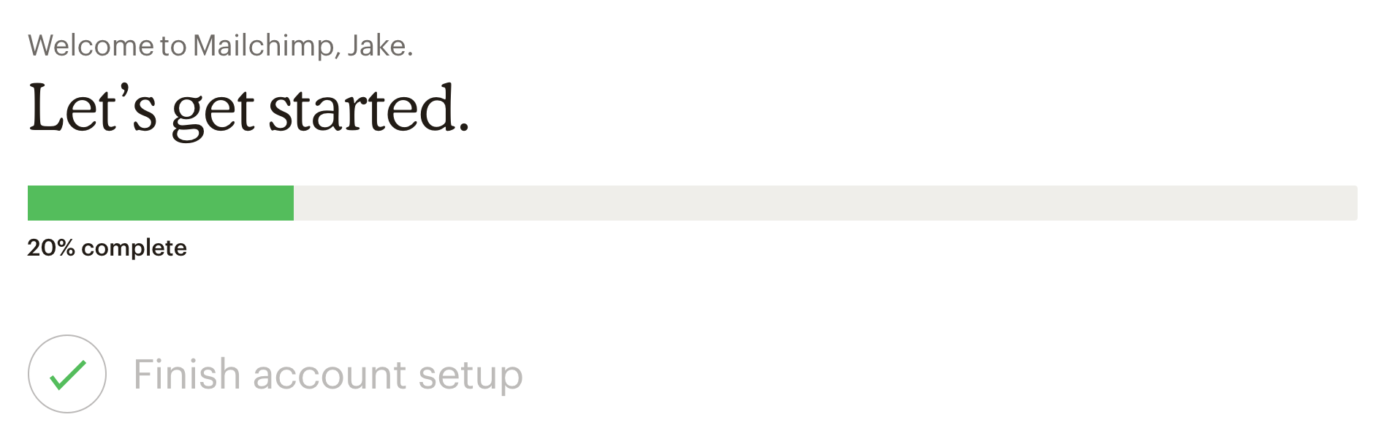
You can skip the “Connect your store” step and go straight to either designing your email or adding your contacts.
Design your email
You can choose to design your email in a few different ways. I’d suggest using Mailchimp’s built in templates, like the “Simple Layout” template. You can easily add your logo and customize the colors, text, and links in the email using their web-based tools.
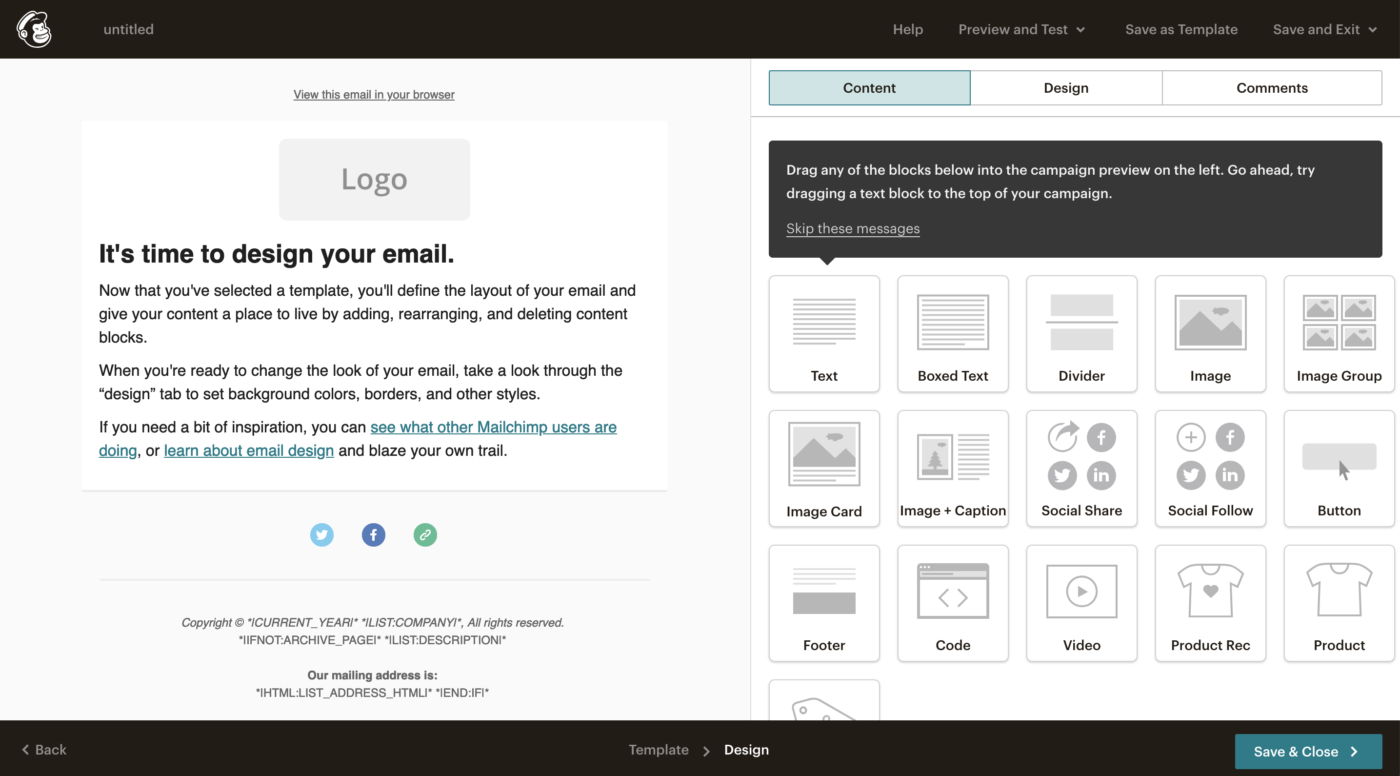
I used these tools to make my email look like this:
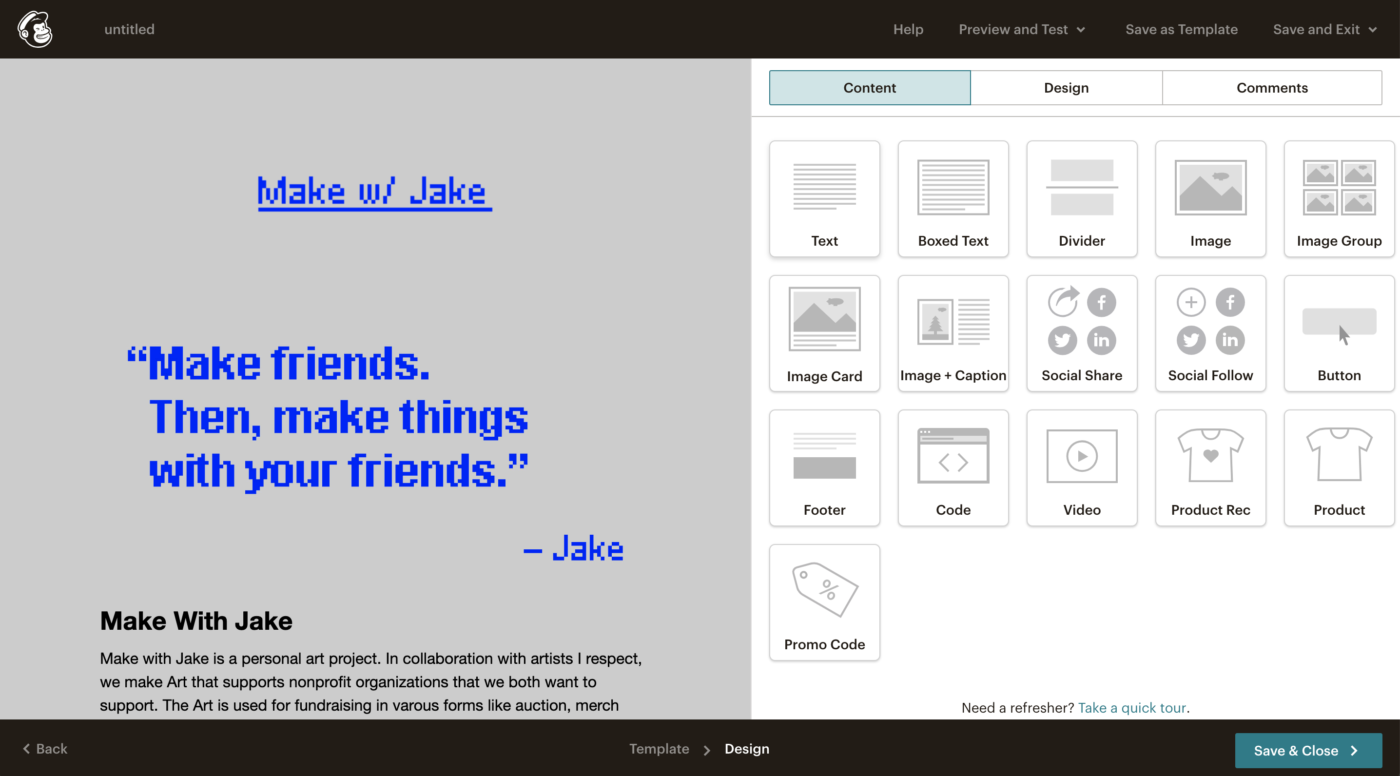
Make sure that if you add images to your email, you are linking them somewhere. It’s important to have a clear call-to-action in your emails so your recipients know where to click and what to do. A nice big “SHOP NOW” link is very effective in driving clicks from your emails over to your shop.
Add your contacts
Next, you’ll need to start building a list of contacts to send your newsletter to. (We wrote a whole post about building an email list here. Be sure to check that out as well!)
A good first place to start is your customer list of people who have already bought from your shop. In your Artist Shop Dashboard, go to the “Orders” section and download a CSV file of your customer information. Then, import this file into Mailchimp. You should do this before each email you send to continue building your list.
Another way to build your list is to manually add any friends, family, or other contacts that you’ve built over time.
Lastly, you can integrate an email newsletter sign-up form to your shop. We can help you with this step. In Mailchimp, click “Lists” on the top of the page and then choose “Add a pop-up form.” Design the form you’d like to add to your shop and then send the code snippet that Mailchimp provides you to our shop support team at shop.support@threadless.com. We can then add that signup form to your Artist Shop on your behalf.
I designed mine to look like this:
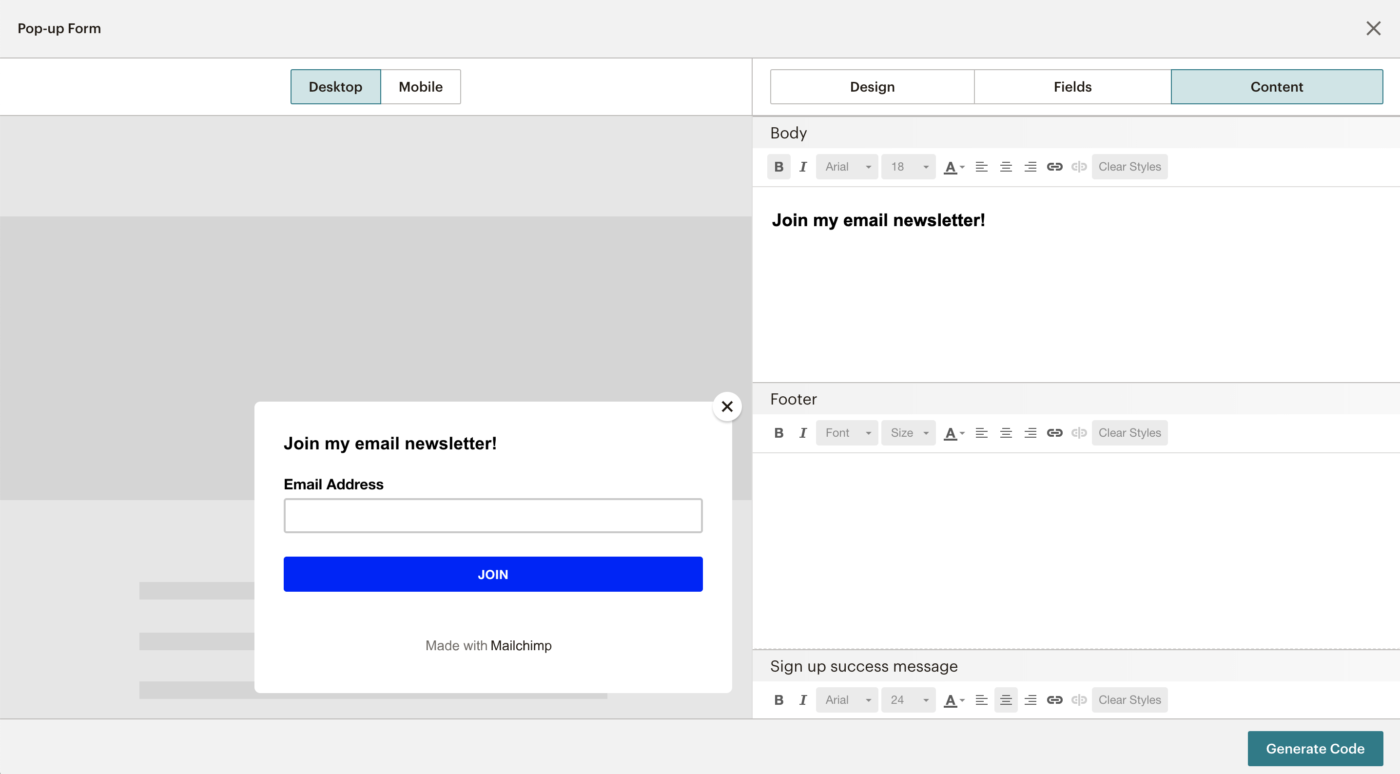
(When you click the “Generate Code” button at the bottom of this screen, that is where you will find the code snippet to send our shop support team.)
Send your first email
Once you have your email designed and you’ve added your contacts to your list, you are ready to send your first email newsletter! We recommend you send an email to your newsletter at least once a week. There are many different reasons to send a newsletter, including:
- Releasing a new design in your shop
- Adding new product options to your shop
- Running a “Free Shipping” promotion
- Running a sale price promotion
- Refreshing your shop’s design
- Adding a collection of products or designs
- Encourage your customers to follow you on social
- It’s a holiday and you have the perfect design for the occasion
Good luck with your new email newsletter!
Related Posts